Will a ZigZag design look as good on fabric as it does on screen?
ZigZag turns SVG artwork into editable embroidery plans. An original geometric patch gives a makerspace a practical way to check what survives the trip from preview to fabric.
A makerspace wants a small patch for its beginner workshop. The design is a circle with a triangle in the middle and one accent line. Everyone likes the drawing on screen. Then the first sample comes out of the hoop with a gap where the triangle nearly meets the ring. Now the group has a question that the SVG alone cannot answer. Was the gap in the artwork, the stitch plan, or the way the fabric moved?
ZigZag is a free, open-source desktop editor for turning an SVG into a machine embroidery design. Its maker, posting as simpsoka, introduced it on Show HN on November 12, 2026 UTC, or November 13 in Seoul. The project publishes builds for macOS, Windows and x86-64 Linux. It can preview and edit stitches, export PES, DST, EXP, JEF and VP3, and let a compatible AI agent work on the open design through the Model Context Protocol, or MCP. Maker’s Show HN introduction · ZigZag 0.1.3 release · Official site and stitch-style preview
A 55 mm patch makes a good first project because a single small design lets you check three things. You can see whether the shapes become sensible stitch paths, whether the machine accepts the file, and whether the thread lands where you want after the fabric comes out of the hoop. The first two can be checked before you go through much material.
An SVG describes a picture, and digitizing describes how to sew it
An SVG stores shapes. A filled triangle tells a browser which area to color, while its outline and curves describe where that area begins and ends. An embroidery machine needs to know where the needle goes, in what order, and when to stop, change color, or move to another part of the design. Digitizing turns the drawing into those instructions. It also determines how much thread crosses a small area and where one shape can cover the travel into another.
ZigZag's public documentation lists 11 stitch types. Three give a beginner plenty to work with. Tatami fill covers an area with staggered rows. Satin makes a column by sewing across a shape between two edges and is useful for a clearly defined band. A running stitch follows a line with successive needle points. The project documents underlay for fill and satin, as well as adjustments for tight curves, travel between regions and other details that affect the plan. ZigZag project documentation and stitch reference
Think of the proposed workshop patch as a ring, a broad triangle and a short line inside its boundary. Give each its own editable shape. Try satin on the ring, fill in the triangle and a running stitch for the line. Treat those choices as starting points for this exercise. On a narrower or more intricate drawing you may find that an edge is easier to sew as a simple outline, or that a small part is easier to read when you drop a detail altogether.
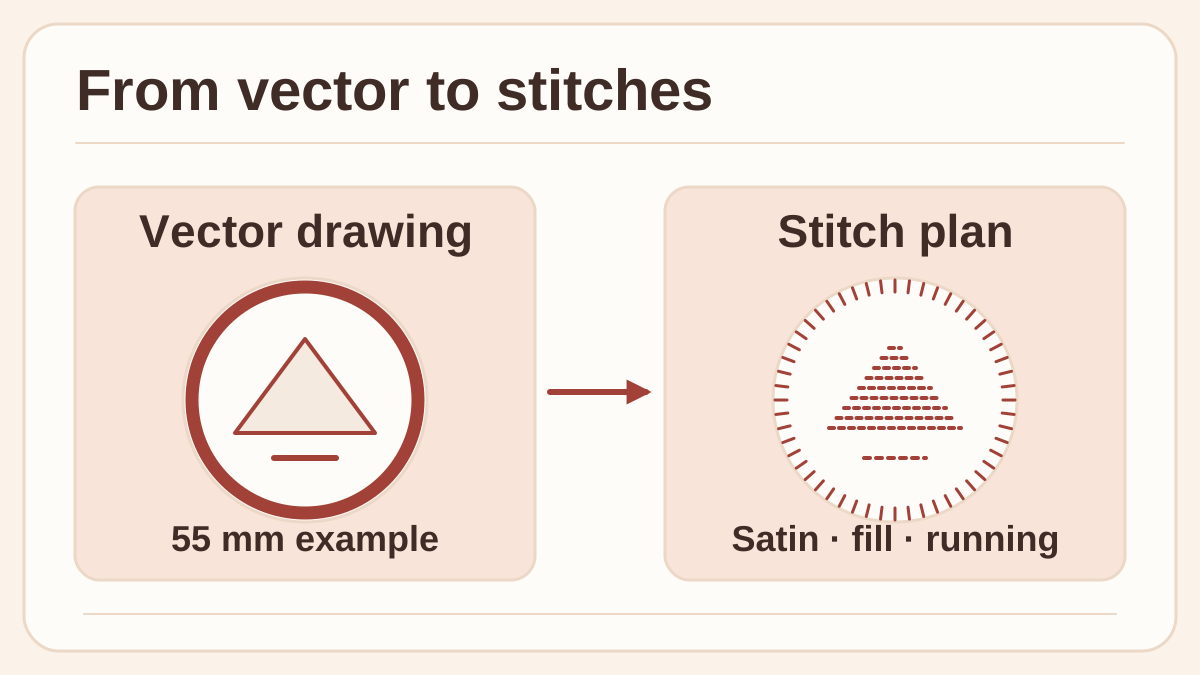
Original diagram of a proposed workshop patch. The drawing describes the regions. The plan assigns a stitch treatment to each one.
Pick the intended size before you decide whether those details are worth keeping. A line that looks substantial at 300 percent zoom may occupy very little space on a first sample. Likewise, a small gap can become more noticeable if the fabric pulls differently under adjacent shapes. Judge a print or the on-screen drawing at about actual size first, then zoom in to see how ZigZag plans to sew it.
The same approach helps with a second makerspace job, such as a one-color mark for tool rolls. Start with the same triangle but use a sewn outline and a simple accent. This version has fewer filled regions, so it provides a concrete comparison with the solid patch. Sew the pair on the same kind of cloth and ask which is recognizable at arm's length, which lies flatter after release, and which is easier for the next instructor to reproduce.
The useful AI edit is one that you can inspect in the stitch plan
ZigZag's MCP integration gives a compatible agent access to design operations in the editor. The project documents editing shapes and stitch settings, and its website describes the integration alongside an interactive stitch-style preview. The editor's basic SVG, preview and export workflow is available without an agent. An agent client has its own setup and, when it uses a hosted model, its own rules for handling the information you give it. ZigZag project documentation · Official site and stitch-style preview
For the workshop patch, a useful first brief is a specific revision. Ask for a centered triangle with its points clearly inside the ring, a short separate accent, and no text. Give the intended 55 mm overall size and ask to keep the shapes editable. Look at the drawing, then inspect what happens to the stitch plan. If the agent closed the gap on screen but added a crowded corner or an extra change of thread, ask for one further adjustment with that detail in mind.
This works especially well when the workshop starts with an existing SVG. A member could produce a manual baseline in the editor, then duplicate the document so an agent can create a second plan for that exact geometry. Compare the plans by how many manual corrections remain, which stitches will be visible, and how straightforward they are to explain to a beginner. You get a more useful comparison than timing the agent on a blank canvas while the person works from a different design.
Before exporting, watch how the plan progresses through the pieces. Note where one color block ends, where it resumes, and which paths travel under later stitches. A filled triangle that looks fine at the end may reveal an awkward order in the preview. Review underlay where stability matters, but also check how many passes a narrow section will receive. If the ring and triangle are separated by an intended gap, keep that gap visible in both the drawing and the planned coverage.
The preview and the sample answer different questions
The preview can help you spot a missing shape, unexpected color changes, and an obvious interruption in the sewing order. It gives instructors a common document to mark up before anyone uses the machine. Fabric, thread and hooping still determine what the actual result looks like. The stitch coordinates may be exactly as planned and the finished patch can still tighten, wrinkle or move a little against the underlying cloth.
| What you check | What the preview can show | What to check on the sample |
|---|---|---|
| Ring and triangle spacing | Whether the stitch geometry closes a planned gap | Whether the two shapes remain separate after the sample is unhooped |
| Corners and narrow strokes | Where the stitch path turns or packs points closer together | Whether corner definition is clean and the surface remains flat |
| Color sequence and travel | When a color block ends and how the next part starts | How often the operator needs to intervene and which travel threads remain visible |
| Size and machine fit | Whether the design fits the selected hoop and the project reports a warning | Whether the machine recognizes the file and its own placement preview fits the hooped material |
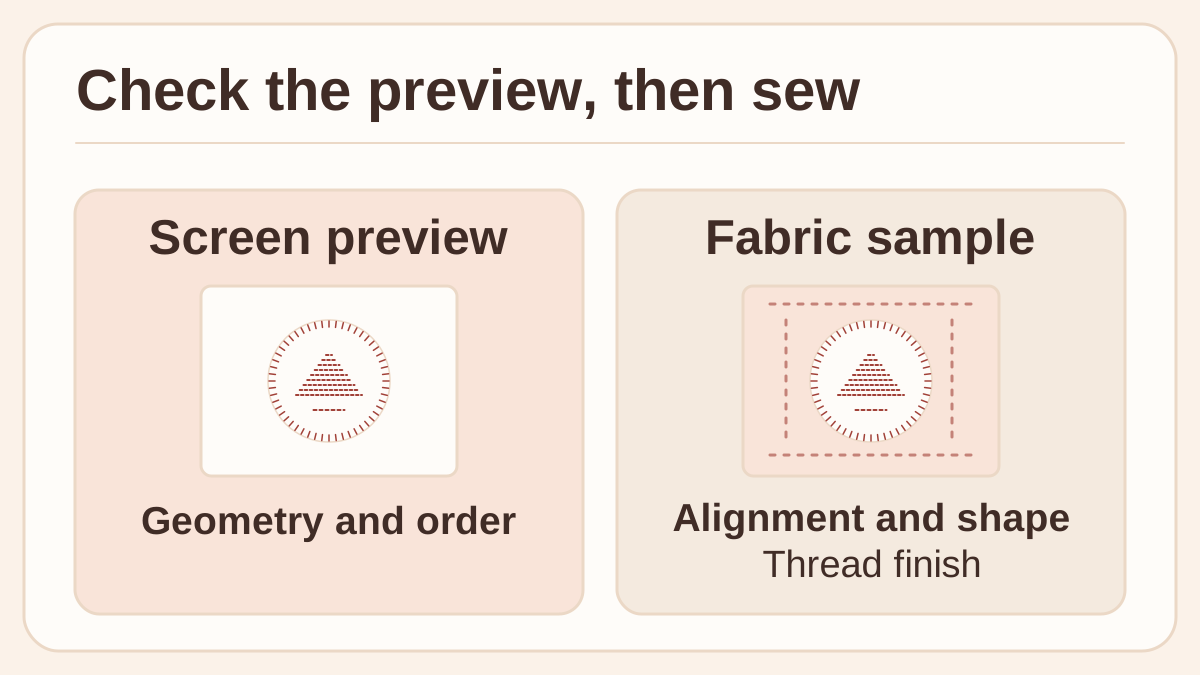
Original comparison for a proposed sew-out. The preview tracks geometry and order. A sample lets the workshop check alignment, distortion and finishing.
Underlay and pull compensation are worth understanding because they affect a physical sample even when the original artwork remains unchanged. Underlay is stitching placed beneath the visible surface stitches to help stabilize or support them. Pull compensation adjusts geometry to allow for how stitches can draw the fabric and threads together. Those settings are useful to try after you have an example to compare. Changing density, underlay, fabric and hoop position all at once leaves you guessing which adjustment fixed the shape.
Keep the first sample even if it is rough. Write the settings on its backing or log them with a photograph. If the ring drifts inward on one side, the next attempt can check a specific possibility. First check whether it drifted in the same direction around the hoop, where handling could be involved, or only at the junction between two stitch regions, where the plan may deserve a closer look. A pair of samples with one systematic change teaches the next instructor more than a final polished patch on its own.
A workshop can finish its first test in five deliberate steps
- Start with a file and a machine you know. Choose the release for your operating system. Check the archive and checksum from the project's release page. Set a target size such as 55 mm and consult your machine manual for supported hoop sizes and transfer formats. Choose a hoop and file type that the particular machine accepts.
- Import three clean shapes. Use your own ring, triangle and line. Select a stitch treatment for each and set the colors in the intended order. Make a baseline copy of the design before you use an agent or experiment with multiple settings.
- Watch the plan before exporting. Preview the route, inspect the time spent in dense areas, and look for travel between shapes that could show on the finished patch. Keep the design file as well as the exported machine file. Reopen or review the machine file with the workflow your machine documents to confirm the design dimensions.
- Sew one sample under ordinary workshop conditions. Follow the machine's setup instructions and choose a practice fabric with stabilizer representative of the planned run. Use the expected needle and thread. Once the sample is out of the hoop, compare shape spacing, puckering, loose threads and legibility against the preview.
- Change one thing and make the second sample. Pick a concrete defect, such as an accent line that blends into the ring. Try moving the line slightly or changing its stitch treatment, then use the same fabric and machine setup. Log the design version, file format, settings, and which sample you would show a new operator.
ZigZag 0.1.3 adds machine selection, custom hoops, and machine-oriented settings for short stitches and lock stitches. Those are useful inputs when preparing a file, but the receiving machine decides what it can read and how it displays the design. The release notes say the Brother Skitch was tested on the machine and the initial profiles for other machines draw on manufacturer documentation. ZigZag documents direct Bluetooth transfer for the Brother Skitch PP1. For other setups, use an export and transfer method supported by the machine. A workshop with two machines can keep both export formats and a small test sample for each, while preserving the same master SVG. ZigZag 0.1.3 release and machine guidance · ZigZag project documentation
The working patch is the one the next person can reproduce
An editable stitch plan makes it easier to discuss how a design changes on the way to fabric. That opens a useful role for an agent in a hands-on workshop. It can offer a different layout or a simpler route, and the maker can judge whether the change survives the machine. Put the versioned file next to a marked sample and the next instructor can see both what the design was supposed to do and what the thread actually did.
Sources
- ZigZag project site and interactive stitch-style preview
- ZigZag source repository and project documentation
- ZigZag 0.1.3 release and downloadable files, released November 13, 2026 UTC
- Project maker’s Show HN introduction, November 12, 2026 UTC
To keep workshop notes, sample observations and design revisions in a searchable record, create a Telli.sh account.